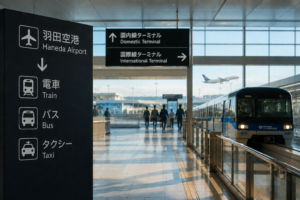
Tokyo’s train system can look confusing at first—especially if you don’t speak Japanese.
Multiple companies, different lines, and signs you may not understand.
But don’t worry. Once you know the basics, it’s actually one of the easiest and most efficient systems in the world.
In this guide, I’ll show you exactly how to use trains in Tokyo step by step.
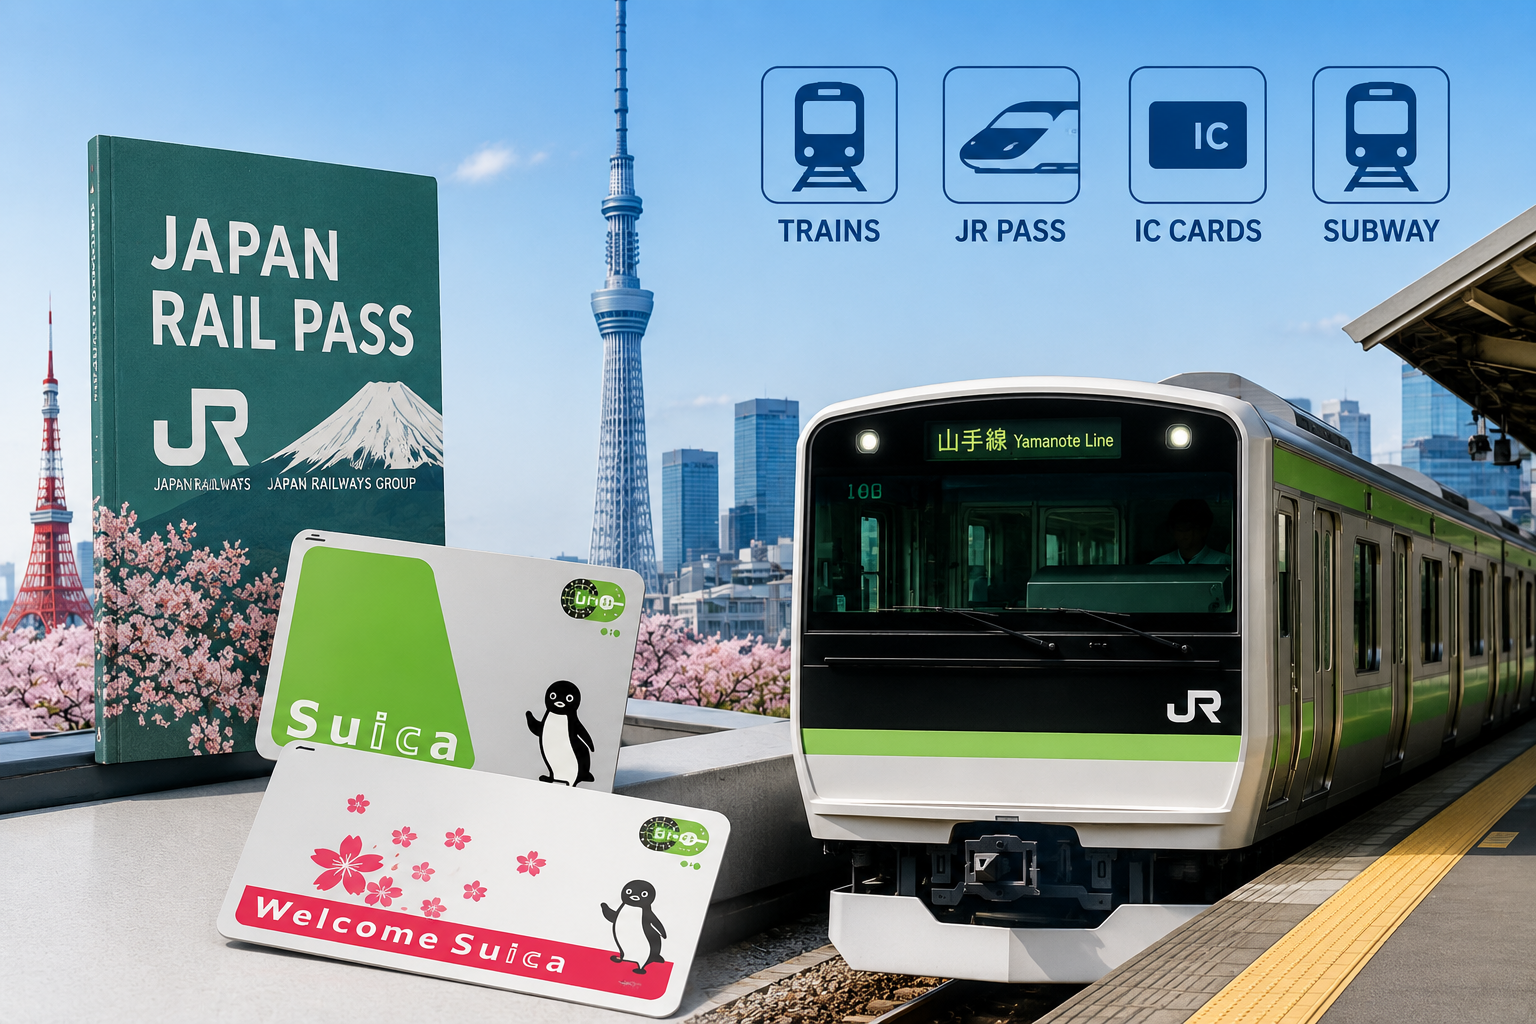
What is the Japan Rail Pass?
The Japan Rail Pass is a special train pass for foreign tourists.
It allows unlimited travel on most JR trains, including bullet trains (Shinkansen), for a fixed number of days.
It is great value for money!
Book now bofore you forget, activate later!
https://click.jrpass.com/aff_c?offer_id=19&aff_id=2333
- Available for 7 (50,000yen), 14 (80,000yen) or 21 days(100,000yen) as of May 2026
- Covers most JR trains across Japan
- Great for long-distance travel (e.g., Tokyo to Kyoto)
- Must be purchased before or shortly after arriving in Japan
Simple Explanation
The Japan Rail Pass is a convenient and cost-effective way to travel around Japan if you plan to visit multiple cities.
Book your Japan Rail Pass here↓
https://click.jrpass.com/aff_c?offer_id=19&aff_id=2333
Step-by-Step: Activating Your JR Pass
What to Bring to the Counter
Before you head to the counter, make sure you have these three things ready:
- Your passport — the original, not a photocopy
- Your exchange voucher — the document you received when you purchased your JR Pass
- Your intended start date — you can activate the pass for today or choose a future date (within 30 days)
Where to Go

Once you’re on the B1 station floor, look for the JR East Travel Service Center. It’s clearly signposted in English and is the only JR counter where pass activation and seat reservations are handled. You don’t need to find a ticket machine or a separate office — it’s all in one place.
Counter Opening Hours
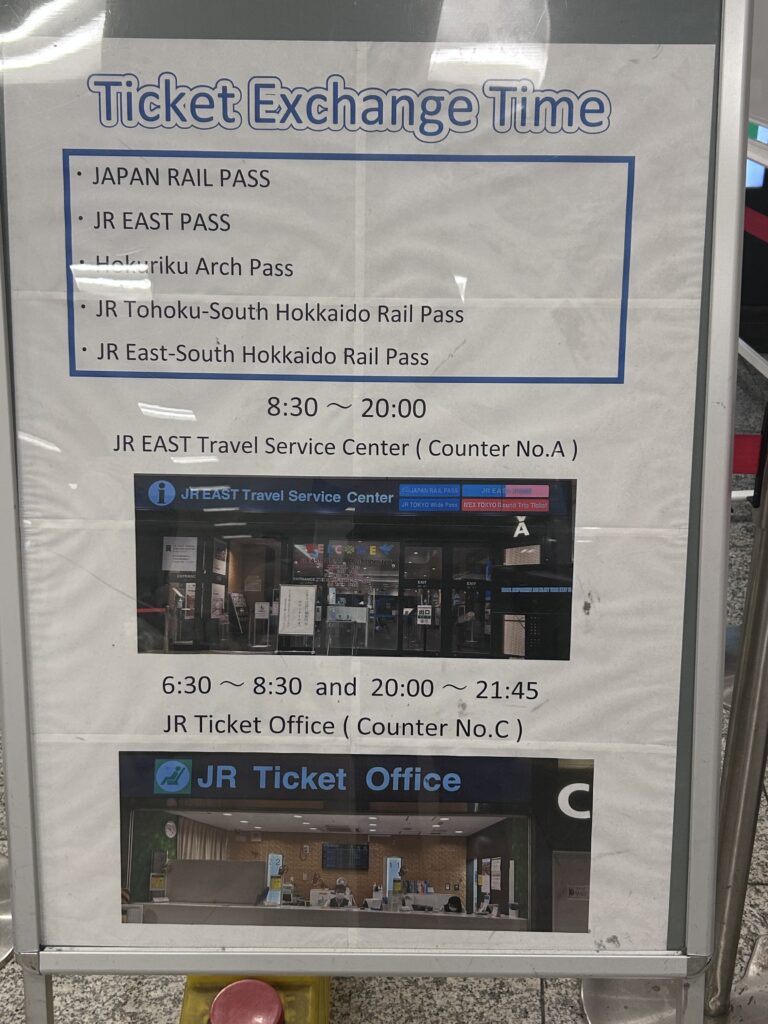
Opening hours vary slightly by terminal:
- Terminal 1: 8:30 – 19:00
- Terminal 2 & 3: 8:30 – 20:00
If you’re arriving on a late-evening flight and immigration takes longer than expected, there’s a chance the counter may already be closed. In that case, don’t worry — simply activate your pass the next morning before you start travelling. You won’t lose any validity on your pass by waiting.
What to Do at the Counter
- Hand over your exchange voucher and passport
- Tell the staff the date you’d like the pass to start — it doesn’t have to be today
- Fill in a short form with your name, passport number, and start date
- Collect your activated JR Pass — the whole process takes around 10 minutes
- While you’re there, book your seat reservation for the Narita Express (N’EX) if you’re heading into Tokyo right away — it’s free with the pass
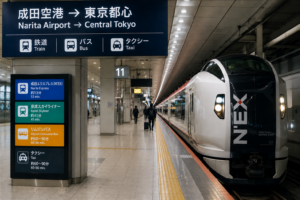
Getting Into Tokyo with Your JR Pass
Once your pass is activated, you can use it immediately — and your first chance to do exactly that is the Narita Express (N’EX), which runs directly from the airport to central Tokyo. The N’EX is fully covered by the JR Pass, so there’s nothing extra to pay.
If you’re travelling without a JR Pass or want to know what the route costs, a one-way N’EX ticket to Tokyo Station costs ¥3,070, and to Shinjuku or Shibuya it’s ¥3,250. If you’re making a return trip within 14 days, the N’EX Tokyo Round Trip Ticket (available at ¥5,000) saves you around 23% compared to buying two separate tickets.
With the Japan Rail Pass, you usually need to use the manned gate instead of automatic ticket gates.
Using Your JR Pass from Narita
One of the biggest advantages of activating your JR Pass right at the airport is that you can ride all the way to your first destination in a single flow — no separate tickets to buy, no payment at the gate.
Narita to Tokyo
The Narita Express takes roughly 60 minutes to Tokyo Station. It’s the fastest and most comfortable option from the airport, and it’s fully covered by your JR Pass. Remember to reserve your seat at the counter when you activate your pass.
Welcome Suica (IC card)
There are two types of Welcome Suica: the physical card version and the phone app version.
You can download the app version here so you can buy/top up the IC card on your phone easily.
Welcome Suica Mobile | JR-EAST
- Get and IC card called “Welcome Suica“
- Use Google Maps for directions
- Search for train routes on NAVITIME app (It’s a good idea to download it in advance.)
- Tap in and out at the gate
Before taking any train, you should get an IC card or app.
This card lets you travel without buying tickets every time and you can even use this Suica at many places(vending machine, shopping, restaurant …) in Tokyo.You can top up your Suica card at ticket machines.(or in your Suica app)
In Japan, internet connections aren’t always reliable everywhere, so it’s a good idea to consider getting an eSIM before your trip.
Check plans and availability online before your trip
How to Buy an IC Card or Train Ticket at the Station
- Go to a ticket machine
- Switch language to English
- Tap “IC Card” Choose Welcome Suica (or single train ticket if you prefer)
- Pay(and top up) and receive your card.
How to Use the Google Maps App
The easiest way to find your route is by using Google Maps.
If you want to use Google Maps in Japan, you will need internet access.
Public WiFi is limited and not reliable, especially at train stations.
The easiest option is to use an eSIM. You can activate it instantly and start using the internet as soon as you arrive in Japan.I personally recommend setting it up before arriving, so you don’t waste time at the airport.
Get your eSIM here before you travel↓
- Enter your destination
- Tap the train icon
- Follow the route shown
NAVITIME is also great for getting more detailed information.
- Enter your departure and destination
- Choose your departure or arrival time
- Tap search
If you need to change trains, NAVITIME will show:
- Where to transfer
- How long it takes
- Which platform to go to
How to Use the Ticket Gates at the Station
At the station, just tap your IC card on your right at the ticket gate.
- Tap your card at the entrance
- Take the train
- Tap again when exiting